nash1111 Tech Blog
Home
How I created this blog PART 2
Setup for hosting Next.js on CloudFlare Pages
fix node-version
create file .node-version and write v16.20.0
since default node-version not working with Next.js
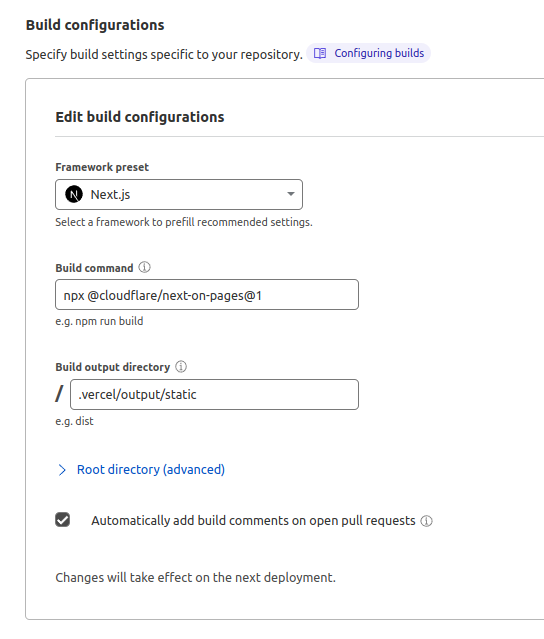
Project Settings
Login to cloudflare and go to pages/workers and edit Build configurations, and connect to GitHub
And you see your next app is running on your domain
I highly recommend run Build command locally
Build command: npx @cloudflare/next-on-pages@1
Build output directory: /.vercel/output/static
Root directory: /
Build comments on pull requests: Enabled
add favicon(optional)
add favicon files on public/favicons/*.png
and edit _document.tsx as below
import { Html, Head, Main, NextScript } from 'next/document'

export default function Document() {
  return (
    <Html>
      <Head>
        <link rel="apple-touch-icon" sizes="180x180" href="/favicons/apple-touch-icon.png?v=2" />
        // rest of your icon links...
      </Head>
      <body>
        <Main />
        <NextScript />
      </body>
    </Html>
  )
}